For good dim light photography 4 things are important. Flash, ISO, aperture, and exposure time.
Flash: There are 2 reasons we want to avoid flash.
1. Its irritating for others when the flash blinds them. Its also easier for us to click snaps quietly without making anyone conscious or aware that snaps are being taken
2. Flash tends to spoil the nice cosy environment by that blast of light, the end result you get is the foreground being bright and the background totally blacked out, something we want to avoid.
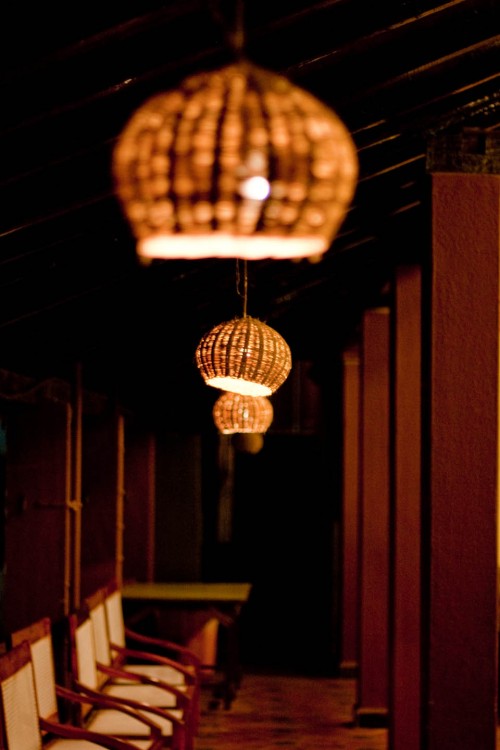
For this snap the flash was turned off.
ISO: The alternative for flash is increasing the ISO. Most cameras will allow you to change ISO, with the default set to ISO 100 which is the minimum, and can be set upto ISO 3200. ISO 100 is best for photography when the light conditions are good. But for dim light you have to increase the ISO, the more you increase the ISO, the more sensitive the camera gets towards light. But there is a downside, as your increase the ISO the clarity of the image suffers in the sense that noise is added (click on the image on the left for a biiger version to see what I mean), hence try to increase ISO in steps without going to the extreme maximum. Also use aperture and exposure setting as explained below.
This snap was clicked with setting of ISO 400
Aperture: Aperture is the opening behind the lens and in front of the sensor. The amount its open can be adjusted in SLR cameras. A wide open aperture means a low reading of say F1.8, and a cosed aperture would be a higher reading like F22. For this snap an open apperure was prefered for was used for 2 reasons
1. It helped increase the amount of light that enters your camera hence ensuring I don’t have to increase my ISO to extreme levels.
2. It Increases depth of field, which means the focus point is sharp and in focus, where as objects in front and behind it are blurred i.e. out of focus, giving the viewer a natural perspective of the place.
This snap uses an an open aperture of F1.8
Exposure time: Exposure time is basically how long will you expose your film/sensor to the light. SLR cameras allow you to set as low as 1/1000th of a sec to 10 Min’s. On a bright sunny day an exposure of 1/250 to 1/400 works fine. But for dim light conditions we have to increase the exposure time. The problem is as you increase the exposure time, the snaps can come blurred if the camera is not steady while you click the snap. If you are holding the camera in your hands, the longest exposure time I suggest is 1/30 sec, else use a tripod stand or place the camera on a tripod etc. Again, if the subject is moving, long exposures wont help.
This snap was clicked with an exposure of 1/30 secs.


WOW…..!! Really charming picture!
Thanks pal!
i can say u will teach the art of photography to lot who will c these pics and ur blogs
Hi Sanjeev,
Thanks! I do try at times to writeup about the techniques, you can refer to http://www.footwa.com/tag/photography-techniques/ on the few I have written.
Cheers Anurag